
Building a Polytunnel on a Slope
Saturday 14th November 2020

Dealing with a sloping site
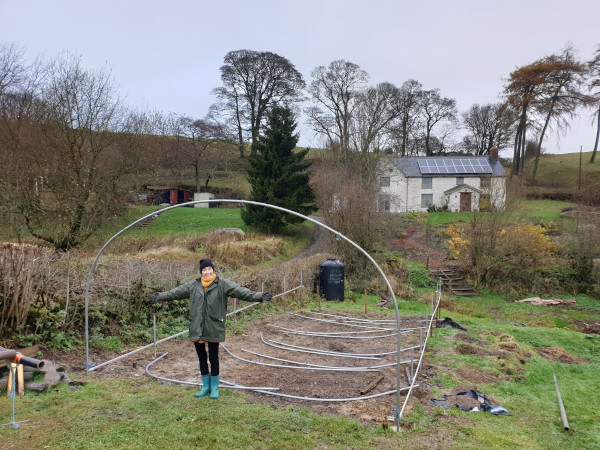
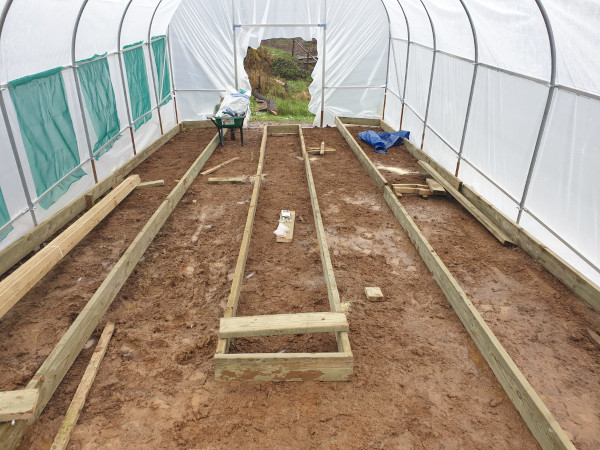
It is obvious, from this picture, how much the site slopes. There is a drop of 60cm from the top of the polytunnel area to the bottom. (Note the polytunnel behind isn't ours, it belongs to the farmer; he grows sheep in it).
The ingenious solution, suggested to us by the farmer, was to put the tunnel on stilts. We purchased heavy duty metal tubes, from a local steel works, and inserted them into the ground so that the top of the tube was at the level the polytunnel would sit if the ground was flat. You can see them in the picture, they are the darker poles that the foundation poles of the polytunnel have been slotted into. The wooden pegs mark the position of the bottom of the polytunnel if the ground was level.
Just for info: The polytunnel is 14ft wide by 30ft long and was purchased from Northern Polytunnels. I checked with the local council before buying and they confirmed I did not need planning permission.
Ground posts in the ground and the first hoop up

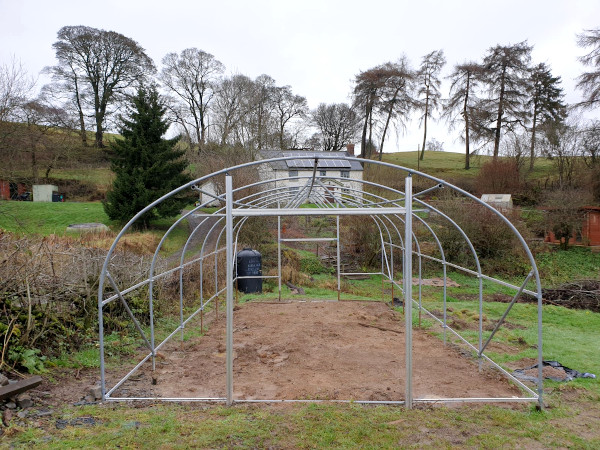
All the hoops up

All three ridge bars in position
Crop bars and the door frame. It's starting to look like a polytunnel

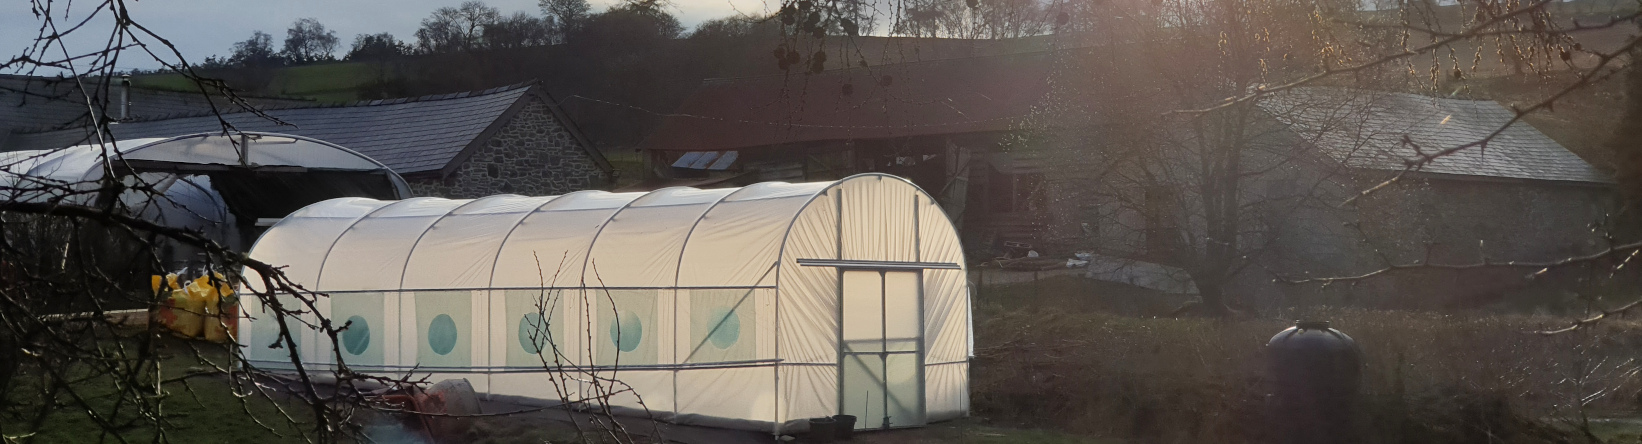
Cover in position
The ideal time to add the cover is when the weather is warm, to make the plastic more pliable.
In Wales in October the weather is more artic blasts than balmy tropics. Unfortunately, the ranunculus needed a home and couldn’t wait until summer. We compromised by bringing the cover into the house, to warm up, but I imagine it would have been much easier to manage if the weather had been warmer.
Attaching the cover to the frame

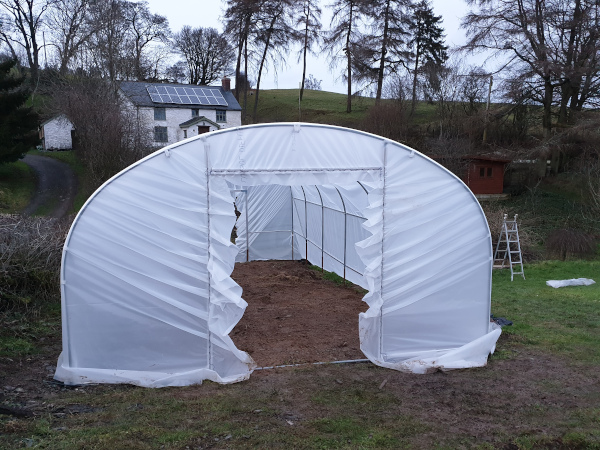
Cover reaching to the floor
We were really pleased to find the cover was long enough to reach to the floor, even with the stilts. This gave us options for fixing the cover at ground level.
Cover attached to the outside of the raised beds
Nick built raised beds and attached the cover to the outside wall. He wrapped it around batons and screwed to the wood. It worked surprising well.

Ranunculus and snapdragons with roses down the middle
All planted up. Amazing.
Freeze frame video of the polytunnel construction (10.7 MB)
Here is a freeze frame movie of the construction.
Three months of hard work condensed into three mins. As you can see, there are a number of changes in the weather. At one point we were building in thick fog and on some days my fingers were so cold I thought they would drop off.
As we were in lock-down we couldn't get help to put the cover on. We picked a calm day but out of nowhere a gust of wind caught the cover and pulled it skywards. Nick had gone around the back to pull from there and at the time I was the only one holding on. I thought I was going to lose it across the field. Unfortunately all that excitement happened in the 10 seconds between camera clicks so all you can see is a tiny wave as the cover rises up from the frame.
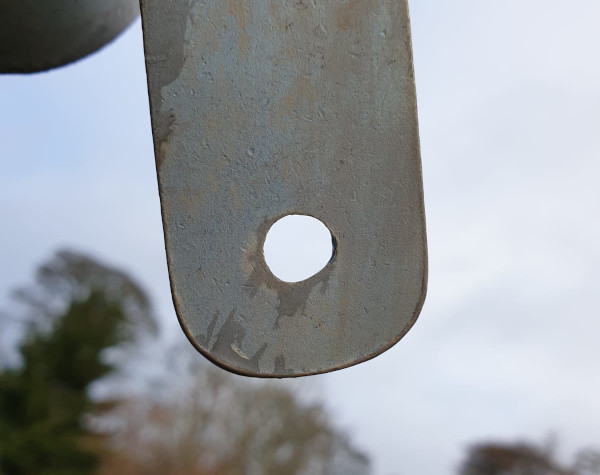
Disappointingly badly drilled holes
So, would we build a polytunnel again? Maybe but on a level site and in warmer weather.
Although it was meant to be an easy build polytunnel there were a number of issues with the kit supplied, such as incorrect instructions and missing parts.
There were also a number of badly drilled holes which caused problems when trying to fit the bolts. To make them fit, Nick had to balance on a ladder and use a drill to round out the edges and allow the bolts to go through.
Although I wrote to Northern Polytunnel, explaining the issues, they didn’t bother to respond and so I would definitely look for another supplier if we ever attempted it again.
Other Blogs
- The Start of the Journey (18th August 2019)
- The Making of a Flower Farm (14th May 2020)
- Hoglets and other Wildlife (22nd June 2020)
- Polytunnel Preparation (15th October 2020)
- Building a Polytunnel on a Slope (14th November 2020)
- Making a Dried Flower Wreath (18th December 2020)
- Sowing Sweet Peas (27th December 2020)
- Organising Seeds (2nd March 2021)
- In Love with the Lent Lily (20th March 2021)
- Tulip Exotic Emperor (25th April 2021)
- Keeping Snapdragons Straight (9th September 2021)